Promoting Your Lightspark Connect Integration to Production
Welcome to the final installment of our Lightspark Connect Developer Guide series. This guide will highlight best practices for promoting your integration to production. We will cover security considerations, deployment approaches, and rollout strategies to ensure a smooth transition to live mode.
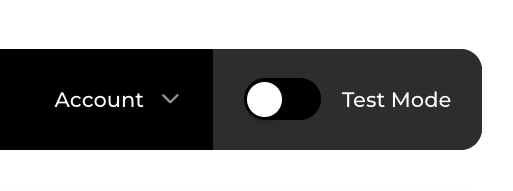
The first step is turning on live mode in your account:
- Log into the Lightspark Dashboard
- Locate the Test Mode toggle switch
- Click to toggle to request live mode
Someone from Lightspark will review your account for approval. This process typically takes less than 24 hours. To expedite approval, please contact your Lightspark contact if you have one. After approval, you'll need to enter your business information and select your subscription plan.
Follow these steps to make your integration more secure.
Remember that in test mode, your Regtest node password is set to "1234!@#$" by default. As part of the Live Mode promotion flow, you'll need to create a Mainnet node password. This node password is permanent and can only be set at creation time.
- Set a strong, unique password for your production node
- Store this password securely
- Follow established protocols for securing and accessing passwords in your application
Remember, this node password is used to decrypt your Operation Signing Key (OSK). Anytime funds are moved off from your node (e.g. an outbound payment or withdrawal), that operation requires your node password and API credentials, so it's important to store these secrets safely.
Create new credentials for your production service:
- Generate new API credentials on the API config page
- Store credentials securely using environment variables or secrets manager
In the case that Lightspark is inaccessible, you can use the Funds Recovery Kit to unilaterally recover your funds to L1. The Funds Recovery Kit copies your node data to your S3 bucket, and provides scripts to generate publishable transactions to recover your funds. You'll find steps to set up the Funds Recovery Kit in the dashboard.
It's 3 simple steps:
- Provide a L1 recovery address to receive Bitcoin
- Create a S3 bucket and specify the bucket name in Funds Recovery Kit config
- Grant Lightspark IAM role access to your S3 bucket
Finally, review the risks and acknowledge them, then save.
Once in live mode, we recommend splitting your initial node funding into two payments. This approach is recommended because:
- Lightspark has multiple routing nodes
- Each funding transaction will result in a channel created to separate routing nodes
- This improves redundancy and reduces the likelihood of transaction errors.
Before enabling public access, manually test by sending payment to lightning-enabled crypto exchanges such as Coinbase and CashApp. Verify that user balances are updated accordingly. Run through user-facing flows and validate that expected behavior occurs.
We recommend a phased rollout of your production service. This could look like:
- Start with 1% of users with Lightning enabled
- Ramp to 10% after validating experimental impact
- Roll out to 100% of users
If you encounter any transaction issues, please contact the Lightspark team.
After successfully deploying to production, establishing robust monitoring practices is crucial for maintaining a healthy Lightning integration. We recommend monitoring metrics such as transaction success rates, total payment volume, and server error rates.
Pay attention to the specific UX flows where users initiate or complete transactions. Consider ways to optimize these entry points. Where possible, streamline these UX flows to reduce friction or confusion in the payment process.
We are committed to supporting your project's success beyond initial technical integration. We'd love to help magnify your Go-to-Market (GTM) communications and share your Lightning implementation journey with our community. Contact us if you'd like us to help showcase your use of Lightspark!
Once you've established a stable Lightning implementation, consider expanding your payment capabilities with UMA (Universal Money Address) integration. UMA enhances your Lightning infrastructure by:
- Enabling fiat currency sending and receiving
- Simplifying the user experience with email-like addresses
- Supporting cross-border fiat-to-fiat payments
UMA builds upon your existing Lightning implementation, allowing you to offer more payment options to your users while maintaining the speed and efficiency of Lightning Network transactions. Check out our UMA introduction.